This part of the system documentation deals with all MCM menu items on the main menu tab System.
It makes frequent references to other parts of the full MCM documentation.
This topic includes the following sections:
This chapter explains how to change the password required to access the MCM system.
When selecting this option, MCM first presents the Current User Password dialog box as shown below.
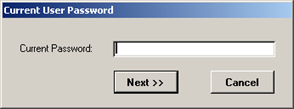
To abort the Change Password action, press the button Cancel.
To continue, simply enter the current password and press the button Next >>.
The New User Password dialog appears as shown below.
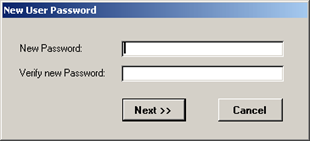
Enter the New Password into the top text box field and verify the new password by re-entering the same
new password into the lower text box field.
To continue, press the button Next >>, to abort at this stage, press the button Cancel.
Continuing with the Change Password action saves the new password and MCM shows the confirmation
dialog box as shown below.
Press the button OK to close the above shown message and return to the main menu.
This chapter describes how to connect to different data sources such as Live/Production data and Sample data.
Changing the data source may be required for training or testing purposes.
The current data connection is displayed at the bottom of the MCM main menu.
When selecting the Change data source Live / Sample menu item, the following dialog box appears.
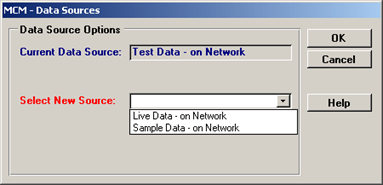
The text box field at the top displays the Current Data Source. Select the New Source from the drop
-down menu and press the button OK.
Before MCM changes the data source, the following confirmation dialog box appears.
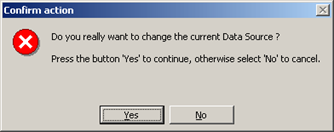
To abort the Change data source action, press the button No.
To continue and change the data source press the button Yes.
The system will take a few seconds to change the connection to the back-end databases and on completion the below shown dialog
appears. It shows the number of database tables linked to.
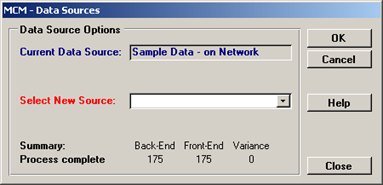
Click the button Close to close the above shown dialog box and return to the main menu.
This chapter describes the MCM File Manager that provides access to all data that can be exported from MCM.
Exporting data from MCM can be done from most forms or registers.
In some instances the File Manager automatically opens upon completion of the export process.
Most forms have an export button that provides access to the File Manager.
The MCM File Manager is shown below.
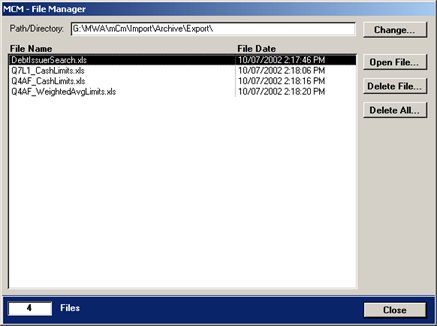
To open a file, select the file in the list box and click the button Open File… or double-click the file/record.
To delete a file, select the file in the list box and click the button Delete File…
Prior do deleting the file, MCM will show the confirmation dialog box.
To delete all files, click the button Delete All…, this will show the MCM confirmation dialog box first.
To view the files in a different Path/Folder/Directory, press the button Change….
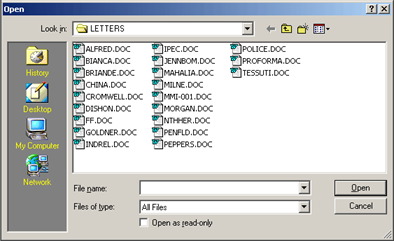
The usual Windows File Open dialog box appears as shown below.
Select the new Path/Folder and double-click on a file in the new directory or select the file and press the button Open.
MCM will only change the directory and not open the file selected.
The MCM security access rights can be allocated across all MCM main menu items.
Determine for each MCM main menu item the actions that can be performed on the called form and by whom.
MCM provides two options for allocating security access rights and they are:
- allocated access rights to business units
- allocated access rights to individual users
When opened, the Security Access Allocation form by default displays all business units.
The form with the selected tab Set Access rights is shown below.
The default access rights can be used for users/business units that do not required special access
rights. Allocate special access rights only to business units or users where they are required.
To set access-rights
- Select an option in the left section Select to view…. This will refresh the content of the small listbox Select a user below.
- Click on a business unit or individual user shown in the small list box Select a user below the options.
- Select one or more records - or all - in the main objects list
- Click one or more of the nine access rights button at the top of the main list. The buttons are explained below.
To start, select an option in the left section Select to view….
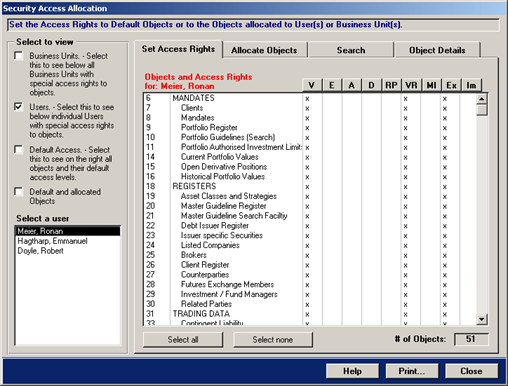
The above shown main list box on the Set Access Rights tab displays all MCM main menu objects that can be allocated.
It will show a X in columns and rows that indicate access was granted to the selected user in the Select a user listbox.
The type of access is explained below.
To set access rights a business unit or individual user and one or more objects must be selected.
Once selected press any of the following buttons.
| V |
Allows viewing the data |
| E |
Allows editing data |
| A |
Allows adding data |
| D |
Allows deleting data |
| RP |
Allows running processes (import/translating for example) |
| VR |
Allows viewing reports |
| MI |
Allows moving items (the position of guidelines for example) |
| Ex |
Allows exporting data |
| Im |
Allows import data |
In the above shown example, the user is allowed to view all forms and reports and can export data to MS Excel.
Allocate Objects refers to the MCM main menu items (objects) that can be allocated to a business unit or user.
The Allocate Objects tab is shown below.
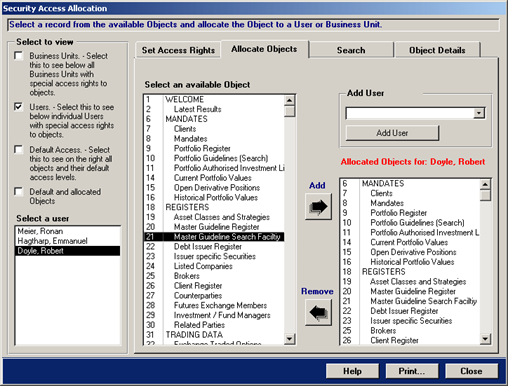
To allocate MCM main menu objects to a user, follow the below listed steps:
- In the left section Select to view choose the option Users
- In the list box Select a user click on a user
- Select a MCM main menu object from the listbox in the middle
- Click the right-pointing arrow and the object will appear in the list box on the right
The above shown tab also includes the Add User option. The option is designed to allow the allocation of
access rights to users that may not be shown in the listbox on the left.
To add a new user to allocate MCM main menu objects to simply follow the below steps:
- Select the user from the Add User drop-down menu
- Select an object from the list box in the middle
- Press the button Add User (located below the drop-down menu)
To add a new business unit to allocate MCM main menu objects to simply follow the below steps:
- In the Select to view section, tick the check-box Business Units
- Select the business unit from the Add Business Unit drop-down menu
- Select an object from the list box in the middle
- Press the button Add Business Unit (located below the drop-down menu)
To remove an object allocation from a user or business unit simply follow the below steps:
- For users - In the Select to view section, tick the check-box Users
- For Business units - In the Select to view section, tick the check-box Business Units
- Select the MCM main menu object that needs removing in the list box on the right
- Press the left-pointing arrow and a confirmation dialog box will appear
- Confirm the decision or cancel the action
The Search tab allows searching for MCM main menu items that are allocated.
The Search tab is shown below.

The above Search tab shows the selected MCM Clients main menu item above the list box.
The list box contains three entries with varying access right settings.
Click on any record and the User or Business Unit name of the allocation appears in a separate dialog box.
The Object Details tab provides object specific settings that may be required for customisations.
The tab is for MCM system adminstrators only.
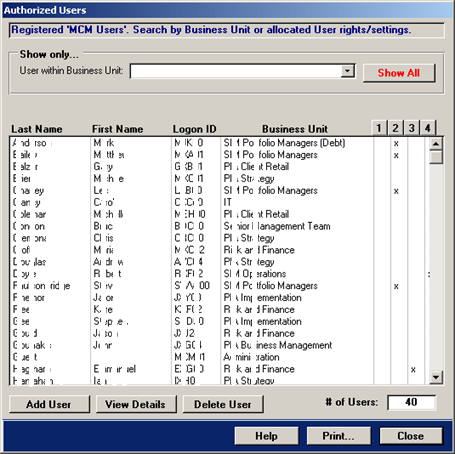
The Users and Business Groups form is designed to store the names of staff members that use the MCM system.
It allows allocating business units and titles. The form is shown below.
Users can be allocated to the Client Mandate form as authorised signatories.
User the Shown only… drop-down menu to show only persons belonging to a certain business unit.
To show all registered users, press the button Show All.
Press the numbered buttons at the top of the list box to view users with special settings.
To view the details of a user, select the user in the list box and press the button View Details or
double-click the record. The Details page is shown below.
To add a user, press the button Add User.
MCM creates a new record and display the record on the Details tab. The tab age is shown further below.
To delete a user, select the record and press the button Delete User.
MCM requires confirmation prior to deleting a record.
If a user is allocated to the Client Mandate form, the system will not delete the record.
Use the number buttons to view users with special settings. The settings are as follows:
| 1 |
Users ceased employment |
| 2 |
Users are signatories to mandates |
| 3 |
The owner of the MCM system |
| 4 |
The administrator of the MCM system |
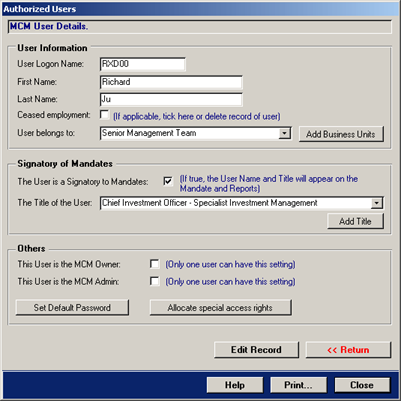
The User Details tab is shown below. To modify details, press the button Edit Record.
User Information
The User Information section contains the logon name, the first and last name of the user,
the business unit drop-down menu and an option to indicate if the user ceased employment.
Signatory of Mandates
The Signatory of Mandates section provides integration to the Client's Mandate form.
A user with this options can be selected as a signatory of mandates.
The name and title will appear on the relevant reports.
Others
The section Others is designed to allocate special overal rights to users, usually one or two users only.
To add a new business unit, press the button Add Business Unit. The page is shown further below.
To add a user title, press the button Add Title. The page is shown further below.
To set the default password, press the button Set Default Password.
To allocate special access rights to the user, press the button Allocates special access rights.
The topic access rights is in the previous chapter. To return to the user list, press the button << Return.
The business units tab is shown below.
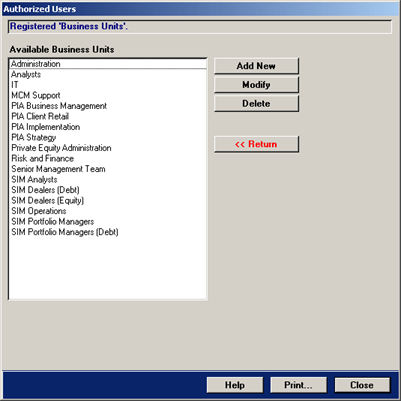
Press the button Add new to add a new business unit.
To modify an existing business unit, press the button Modify.
To delete a business unit, press the button Delete. MCM requires confirmation prior to deleting records.
To return to the user Details page, press the button << Return.
MCM is a client server application that relies on valid folder configurations to function properly.
The application is typically installed in two different locations for the Client and Server.
It is recommended that the MCM server databases are located on a drive that is backed up on a regular basis.
The MCM client application usually resides on the C drive.
The recommended C drive installation for the MCM client is: C:\Program Files\BlakeDev\MCM\
A typical MCM installation environment is shown below. When changing the environment create the new folder
structure first and then point the MCM application to the new environment.
| Folder |
Component |
Description |
| C:\Program Files\BlakeDev\MCM\ |
MCM Application [MCMClient.mde] |
The folder for the MCM Application must have read/write access |
| G:\MCM\Livedata\ |
MCM Server [Mcm_Day.mdb], [Mcm_Stat.mdb], [Mcm_sys.mdb] |
The key production data folder (Live Data) for the 3 server databases on a network drive |
| G:\MCM\Testdata\ |
A copy of the MCM Server [Mcm_Day.mdb], [Mcm_Stat.mdb], [Mcm_sys.mdb] |
A folder for testing purposes. Copy the 3 server databases from the Live Data folder |
| G:\MCM\Export\ |
Exported MCM data |
The folder is required for MCM to export data to. Create sub-folders if required |
| G:\MCM\Import\ |
Folder |
The main import folder. Create additional folders for each data provider |
| G:\MCM\Import\[DataProvider1] |
Folder |
The main import folder for Data Provider 1 - ie State Street. Ensure the folder name has no spaces |
| G:\MCM\Import\[DataProvider2] |
Folder |
Create as many Data Provider folders as required. This is driven by the regular data received from
various sources - ie custodian data, futures brokers data, manager data etc |
| G:\MCM\System\ |
MCM System Files |
The key system folder for components that are required by the MCM application |
| NOTE The G:\ drive example used above is for illustration purposes only. |
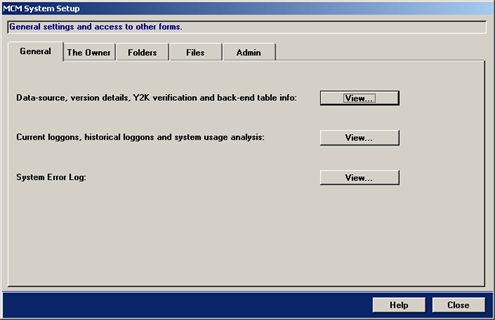
The MCM System Set-up - General form's tab is shown below.
The form contains key MCM settings that are required for the operation of the system.
The buttons on the General tab open the following forms each is discussed in detail further below.
- Data-source
- Current logons
- System Error Log
The second tab of the MCM System Set-up form is The Owner tab. The tab is shown below.
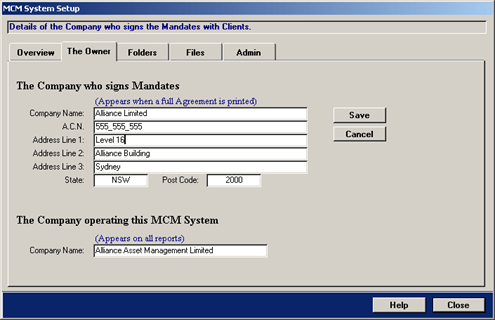
The section The Company who signs Mandates contains the information that is displayed when a MCM Client Mandate is printed.
The section The Company operating this MCM system contains the name that appears on the main menu and at the top of all reports.
To change any of the details, enter the information and then press the button Save.
The Folders tab is shown below. It contains the paths/folders to the key MCM system components.
Changing folders and component settings may impact on the performance of the MCM system.
Items in this section usually change rarely!
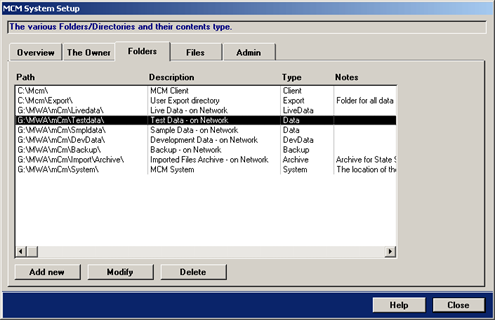
To change the details of individual components, double-click an item or press the button Modify.
The following screen will appear.

Enter the new information and press the button Save.
The Files tab is shown below. It contains the file names of the key MCM databases.
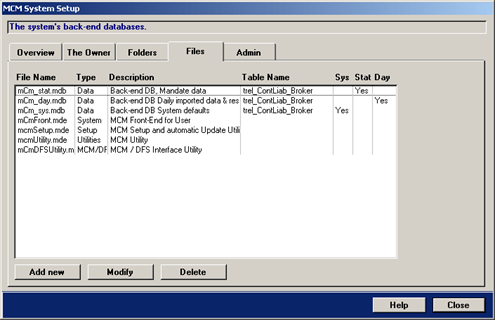
Items in this section should not be changed!
The Admin page of the above shown form is designed for MCM customisation information only.
The MCM – System Info form and the selected General tab is shown below.
To access this form click the button View Data Source on the previously shown form's General tab.
The tab shown below provides access to the various Data Sources that can be connected to.
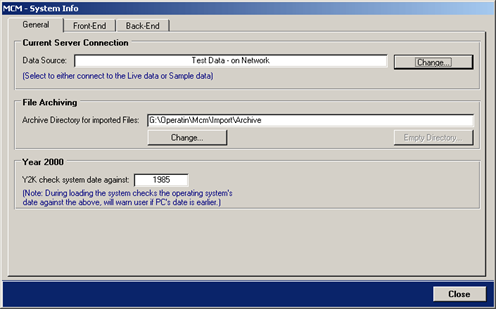
The above shown File Archiving section includes a text box that contains the path to which MCM archives all imported files.
To change the path, press the button Change….
The Year 2000 section's field value is used by MCM to check dates against.
MCM provides a warning message if dates are encountered prior to this date.
The Front-end tab provides the version and release information of the MCM Client application installed.
The page is shown below.
The version and release details can not be changed.
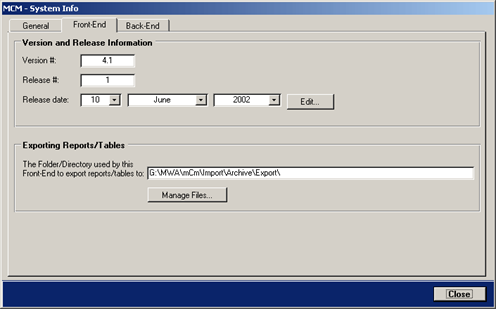
The Exporting Reports/Tables section contains the path/folder where MCM exports all data to.
To view any files located in that path, press the button Manage Files…
The Back-end tab is shown below and it provides an overview of the three major MCM Server databases,
their location and the number of tables they contain.
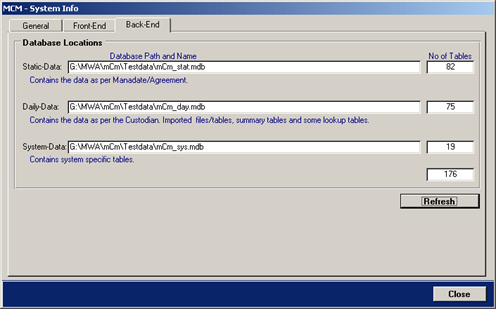
To retrieve the number of tables for each of the major back-end databases, press the button Refresh.
The System Error Log tab is shown below.
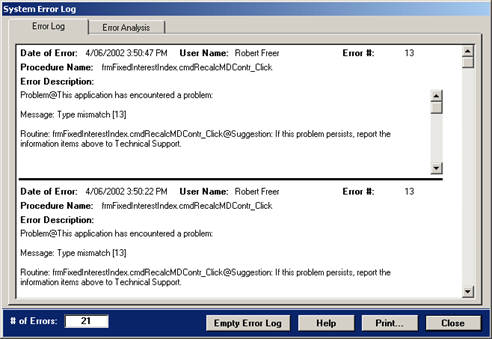
The following system tables are relied on when running the major MCM processes.
- Cash / Realisable Assets Definition
- Countries / Exchange Rates
- Credit Ratings
- Industry Sectors / Groups
- Investment / Security Types
- Stock Exchanges
The Registered ‘Cash / Realisable Assets Definition’ form is shown below.
Definitions are allocated to the Portfolio Details form.
The number of definitions is set, only the descriptions can be changed on this form.
To read more about allocating definitions to the Portfolios form, click here.
The records are read only.

Once open simply select an option at the top. To view the Cash definitions, click the Cash option.
To view a description a record, select the record in the upper list box and view the description in the lower text box.
To view the Realisable Assets definitions, press the option button Realisable Assets.
The Registered ‘Countries / Exchange Rates’ form is shown below. Countries are used in the
Debt Issuer Register and the Listed Company Register.
Both registers are discussed in the documentation Registers.
To view the Debt Issuer Register chapter, click here.
To view the Listed Company Register chapter, click here.
The records in this register are read only.
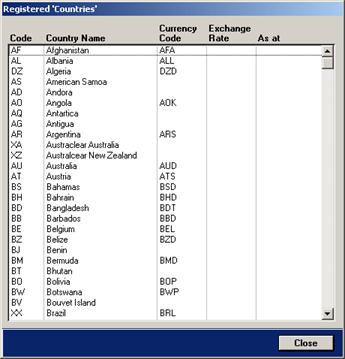
The Registered ‘Countries’ form contains the country code, the country name and currency code.
The exchange rate and the value date are automatically added by MCM where appropriate.
The Registered ‘Credit Ratings’ form is shown below. Credit Ratings are allocated via the
Debt Issuer Register to issuers and debt securities.
Issuers and the allocation of credit ratings is discussed in the documentation Registers.
To view the Credit Ratings chapter, click here.
To view the Debt Issuer Register chapter, click here.
The records in this register are read only.
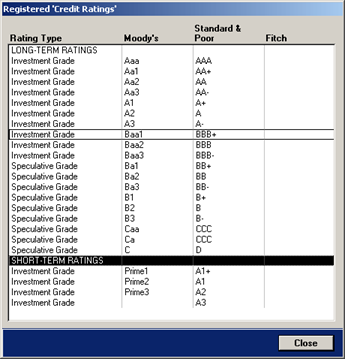
The register contains standard long-term and short-term ratings.
The Registered ‘Industry Sectors / Groups’ form is shown below. Industry Sectors / Groups are not
used in MCM although many forms contain a drop-down menu with the Industry Sectors / Groups.
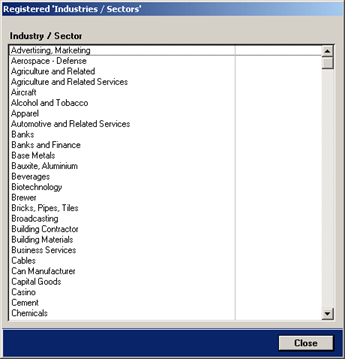
The records in this register are read only.
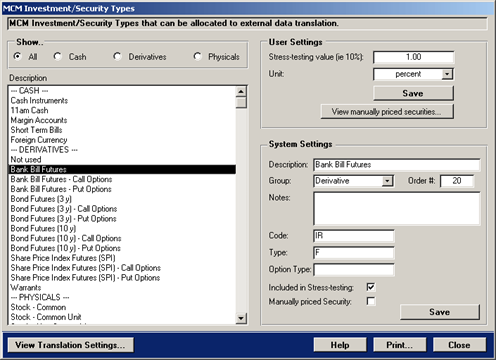
The Registered ‘Investment / Security Types’ form is shown below.
The register contains the investment/security types that MCM can process and it provides access to each
investment type’s stress testing value.
Setting the stress testing value is also discussed in the documentation Compliance Advanced Settings in the
chapter MCM Investment Types.
To view this chapter, click here.
All other settings are read only.
To view the Stress Testing values, select a record in the list box and view the settings in
the section User Settings.
The Registered ‘Stock Exchanges’ form is shown below.
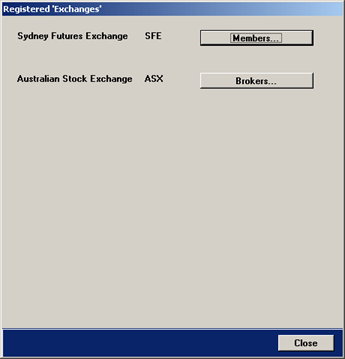
The register provides access to the authorised Brokers and Futures Exchange Members.
Both are discussed in the manual Registers.
To view the Brokers chapter, click here.
To view the Futures Exchange Members chapter, click here.